Pages

Showing posts with label DIY Destiny. Show all posts

Tuesday, October 23, 2012

DIY Sesame Street Costumes: For less than $20 and in an hour


When I was little my grandma use to make our costumes for us. I vividly remember one Halloween asking to be a purple unicorn and how excited I was when my grandmother brought that costume to reality. I hope that one day B can look back on the fun we have had together just as I do now.


Always in favor of a photo op, I began thinking about Halloween costumes early (like maybe November of last year) and totally got stuck on the idea of doing a Sesame Street theme. After two years of purchasing costumes I decided I was ready to tackle a DIY project so I knew I needed ample time to prepare. I started questioning B about costumes a few months ago and we settled on Big Bird, lucky for me, my dear friend Sarah’s daughter is obsessed with Grover so I had a partner in crime to work with.

Please note Sarah and I are both bat Sh*@ crazy which is why we get along. We are somehow lucky enough to found ourselves a group of other ladies who are willing to be just as bat SH*@ crazy as we are, especially when it comes to holidays, play dates and photo ops. I am so thankful for this band of brothers who went above and beyond to make my dreams of a DIY costume year come true! To Sarah, Katie, Abra, Kate and Dana, thank you (and your adorable children) for rocking my socks off!

If you are looking for a cute, cheap and easy enough costume to make for your toddler (or yourself) check out our own DIY version of Sesame Street gone WILD!

What you will need:
1 Hooded sweatshirt in your color of choice (we ordered ours from jiffyshirts)
2-3 foam balls ( we used 2 inch ones from Michaels)
Felt (white and black for eyes and nose color of choice if needed)
Glue gun
Thread and needle
Scissors
·         Many of the costumes required additional items such as Abby and Ernie’s hair or Big Birds beak but Ill go through that later.

Eyes: Cut a square of white felt for each eye. Glue the felt to the foam ball using the glue gun, glue the black felt circles on to each of the felt covered balls and stitch the eye ball onto the hood of the sweatshirt. You could glue the whole eyeball onto the sweatshirt instead of sewing it but I wanted to be able to use the sweatshirt again and not have glue stuck to the outside of it.
Noses: If your character has a nose (Elmo, Grover, Abby, Ernie) cover your nose with felt and sew or glue it onto the sweatshirt between the eyes.

Additional Items:
Big Bird: for his eyes I covered the back half of each of the eye balls with pink felt and then drew a bright blue rim with a blue sharpie marker on each of them to create the effect. For his beak I used one yellow piece of felt. I folded it into a triangle shape and glued it together in a triangle shape. Once the glue was dry I stitched the beak to the underside of the hood trying to only get the thread through the inside layer of the sweatshirt so that the stitching would not show through. The biggest undertaking for this costume really was the legs. I found a pair of orange sweat pants for $8 on clearance at Old Navy which had me doing a happy dance. I purchased the awesome pink ribbon at Michaels and did a really easy stitch job to secure the ribbon to the pants. I plan to cut the stitches out after Halloween so that B can continue to wear those awesome sweatpants all winter. SCORE!
Ernie: Ernie’s mama (703 Mommy & Me contributor Katie) used a piece of black faux fur to create the hair. Fur like this is readily available at fabric stores and since you only need a 2 or 3 inch piece it is super cheap. Katie achieved Ernie’s striped sweater look using painters tape! How cool is that?? What a great cheap and easy to get the effect without having to do anything permanent to the shirt!
Abby: Abby’s mom Kate is a master crafter which is why her hair is simply BANANAS! Her eyes were accomplished by adding a fan of black felt to the back side of the foam balls to create her signature eyelashes. We used the same blue sharpie to line her eyes and then added a dot of white out to complete the look. Her pig tails are poms of yarn that were sewed into the top of the sweatshirt.

The basic level outfit cost each of us $15 for the sweatshirt and less than $3 for the other supplies. Each outfit took about an hour to assemble which means you all still have time to make your own custom costume for under $20! 

Tuesday, September 18, 2012

School Traditions


The first day of school is finally here!!! I still remember how excited I use to get every year on my first day and I want to instill that same excitement in my little guy. We have done all the “prep” work now, reading first day of school books, picking out a special outfit and even preparing his backpack for the first day! I am not going to lie, I thought a backpack was a bit ridiculous for a 2 year old but then my mom pulled out the LL Bean backpack that my sister, brother and I all used for preschool and I decided that B had to carry on the tradition. A little ribbon and stitch witchery later we a super cute personalized backpack that is just perfect for B’s extra diapers and clothes. I love that he is carrying on a tradition but also making it his own (since he got to pick out the dinosaur ribbon) so that got me thinking about other first day of school traditions and I thought I would put together a list of my top 5 favorites that I would consider incorporating into our family too.


11. The super cute first day pictures with a sign (they are on every parent’s Pinterest or Facebook wall)
2. Favorite meal- preparing a special meal (either breakfast or dinner) for your little ones first day. We did chicken nuggets and apples for lunch, B’s current favorites
33. Afternoon snack- Katie’s family is carrying on  her husband’s tradition of fresh baked cookies and milk at home after school
44. First day video- capturing what the first day of school was like from his own mouth.
5.  Special lunch treat- leaving a special surprise and note in his lunch box to help cheer him on.

We really did have an awesome first day of school and while I had a laundry list of things to accomplish on my “first day of freedom” I was super excited to be able to stick around and witness first hand all that he was experiencing. I was really excited to see that a lot of the songs and rhymes that his teacher used were the same ones that we have done in Music Together throughout the last two years. I really think it brought that level of familiarity to the experience for him and at one point he even said “Bee-anne sings that” (Breanne has been his Music Together teacher.)  I love that we got to create these memories together and I am super excited for what the next year has in store for us.

Tuesday, May 1, 2012

Star Struck: Cinco de Mayo craft and decor

Cinco de Mayo is right around the corner and I am a sucker for a holiday themed party so I am super excited to be preparing for a fiesta themed co-ed baby shower Ill be hosting that day! While I usually hate giving away surprises before the big reveal I decided to relax a bit and share the love. 
Festive DIY Star Centerpiece


I love event planning, choosing the menu, decor and all the details that go into giving each event that personal touch. A cute table arrangement is one of the easiest ways to jazz things up a bit and while the traditional route is to go with flowers I decided to go another way this time. I came across this super cute paper star tutorial while on Pinterest and thought they would make a perfect fiesta centerpiece. There is still more to come so stay tuned... but was super excited how they turned out so I had to give you a sneak peek.


I made several stars out of craft paper and glued them each to an extra long kabob skewer and stuck them all in a terracotta pot to bring in a natural southwestern feel to the whole thing. Each star took about 20 minutes to assemble so it is definitely a time consuming project but I do think I got faster and better as I figured the process out. I think they turned out super cute... hopefully everyone else does too!

Wednesday, February 1, 2012

Trendy Tot Cooks A LOT

Little B shares his mamas passion for cooking or "tooking" as he says it. While he has not yet mastered his palate yet he does LOVE to help so for our second installment of Trendy Tot's over at Mummy's Busy World I thought I would post a pic of his super cute pint sized apron courtesy of my Grandmother along with a tutorial from another blog I follow on how to make one of your own for the budding chef in your family. 
lil B in a vintage handmade Christmas apron

Wednesday, December 21, 2011

Holiday Card Displays

Snail mail makes me happy. Especially around the holidays when we are getting all sorts of fun cards in the mail. Don’t get me wrong, I love the convenience of electronic mail, invitations etc but there is just something so fun about actually receiving and opening an old fashion letter. Its totally a dieing art but one that I support with all my heart.

Since someone obviously took the time to create and send their holiday wishes I am always looking for new ways to display and use the cards we receive. This year we did a photo montage on our kitchen cabinets which was super easy and has provided hours of fun for little B to entertain himself with. All you need is a roll (or two) of your favorite holiday ribbon, scissors and tape and you are in business.
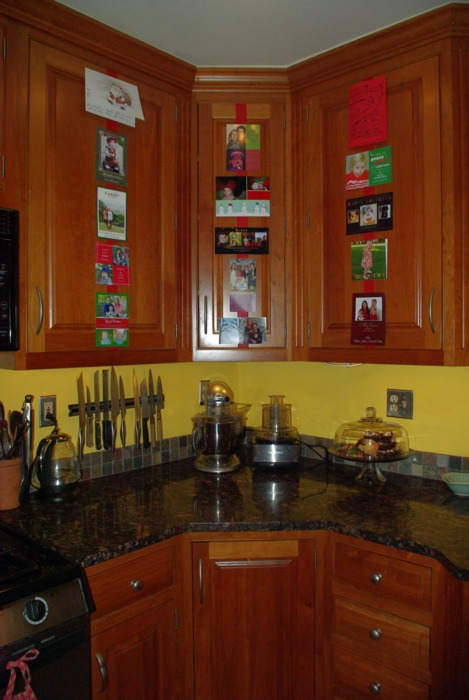
If we had a larger house I would totally do a Christmas tree decorated with just lights and holiday cards next year. How fun would that be!

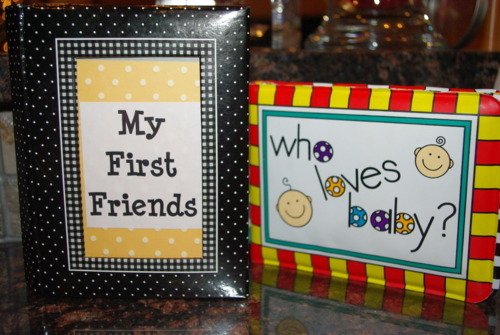
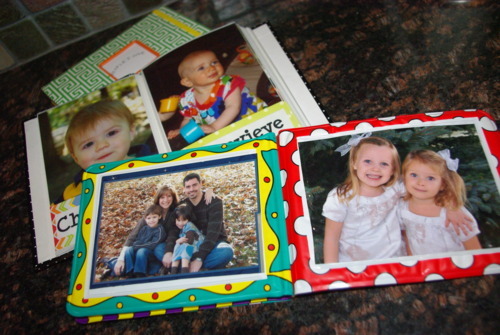
Taking it a step further, save your holiday cards and and turned them into a “who loves baby” or “babies first friends” photo album. Pick up a cheap dollar store photo album and place each photo card in a slot with the names of your little ones friends and family under the pictures. You may have to trim the cards to fit them but it makes an adorable reminder to keep around for the whole year. Little B has several books like this that he adores looking through on a daily basis.
Thursday, December 15, 2011

Holiday Handprint Art

When it comes to holidays and religion we probably fit best into the suma category. Some of this, some of that. My Japanese mother grew up in a Buddhist family, my mid-western father grew up in a Presbyterian household, I identify myself as Christian but I didn’t form that identity until I late in high school. To throw another ingredient in the mixing bowl of life I went ahead and married a wonderful man of eastern European Jewish descent and created a beautiful baby boy who is going to be one confused little cookie when he is asked to check boxes someday.


I tend to get myself in a tizzy trying to think of creative, crafty and yet not tacky ways to decorate my home for the holidays so I was super excited to try out my newest hand print art idea to represent the holidays that represent our family this time of year. They were both super easy, and fun and would make great family gifts “painted” onto cards, in frames or even on shirts for a loving (and not embarrassed grandparent) 
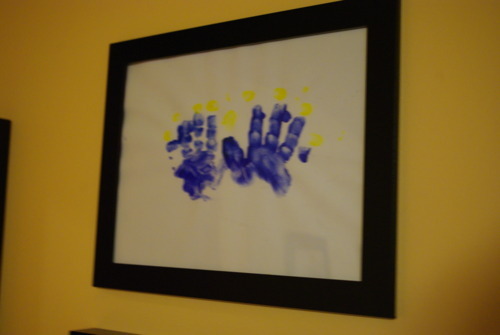


Behold, B’s tubby little hands (and finger tips) as a lit Hanukkah Menorah
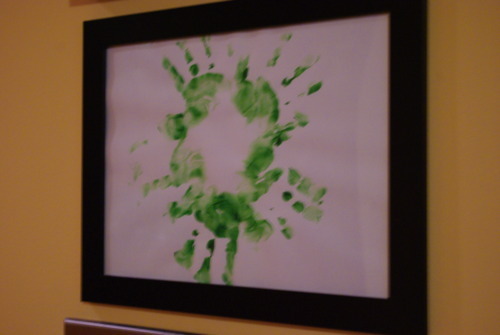


and again, as a Christmas wreath. (this one did NOT photograph well)